
Only Site
(server)
- "Per visitor" CSV: one row (the identification name column contains the devices separated by commas — "Reception A,Reception B").
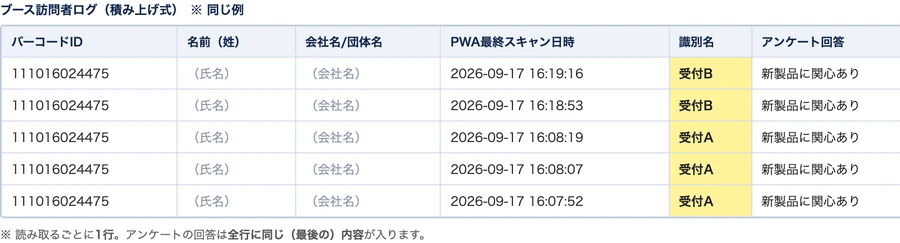
- "Cumulative" CSV: two rows, one for Reception A and one for Reception B.
This feature is available only to exhibitors who have applied for the QR Code Scanning App (PWA).
We provide an app for scanning the QR code displayed on admission passes. Instead of exchanging business cards with visitors, you can scan their registration information with a smartphone or tablet, enabling smoother collection of visitor data.
* Hereafter, this feature is referred to as the "PWA". PWA stands for "Progressive Web Apps," a mechanism/technology that allows websites to be used like apps.
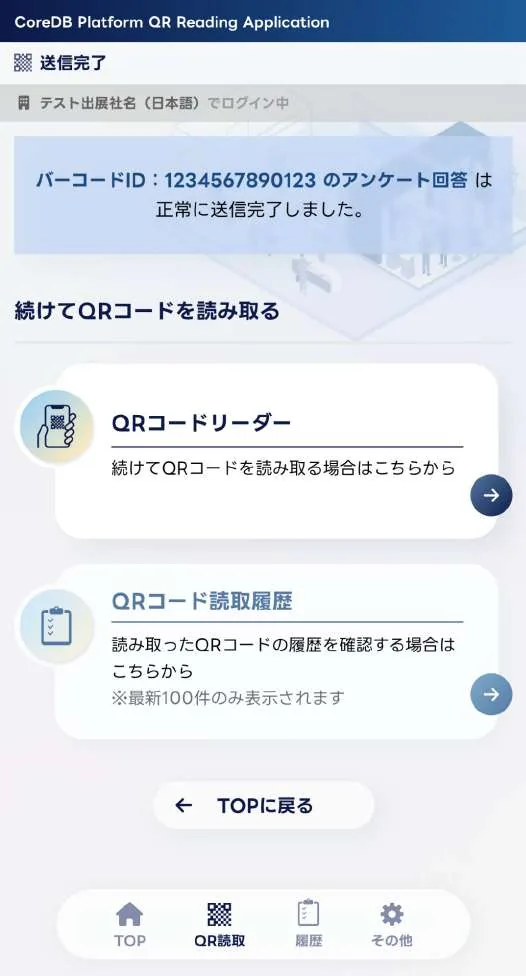
* QR codes are scanned one at a time. After each scan the app moves to the confirmation screen, where you can check the details before sending.
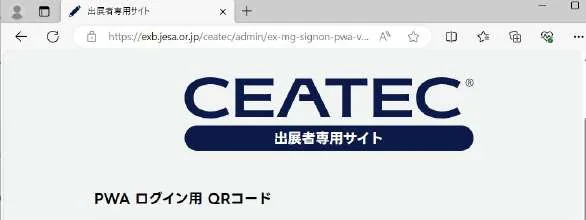
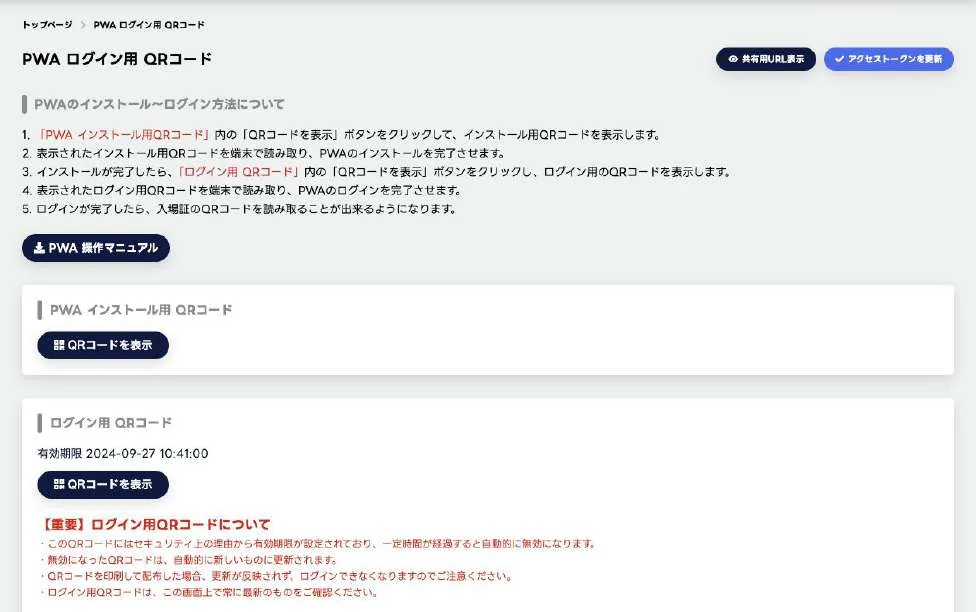
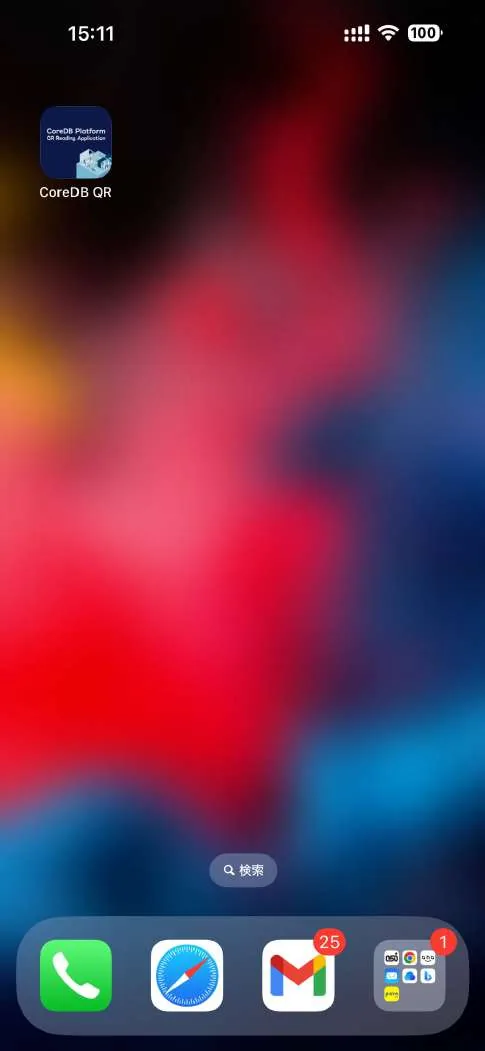
Install the app on your device. Access the following URL on a PC and log in to the Exhibitor Only Site.
https://exb.jesa.or.jp/ceatec/admin/ex-mg-signon-pwa


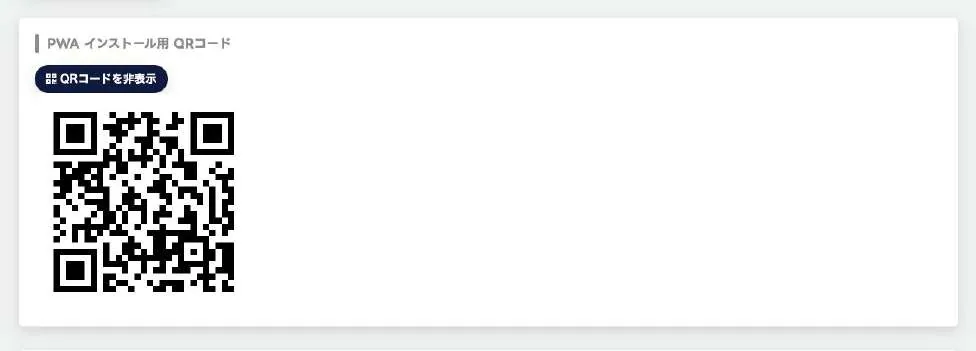
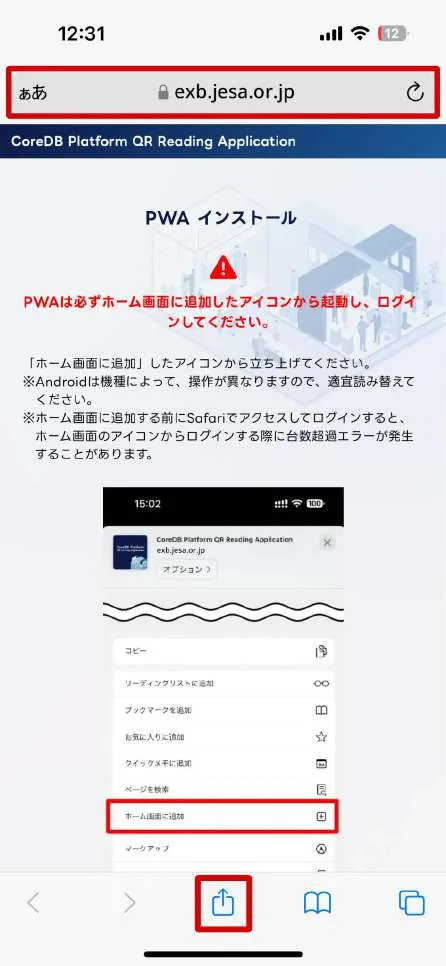
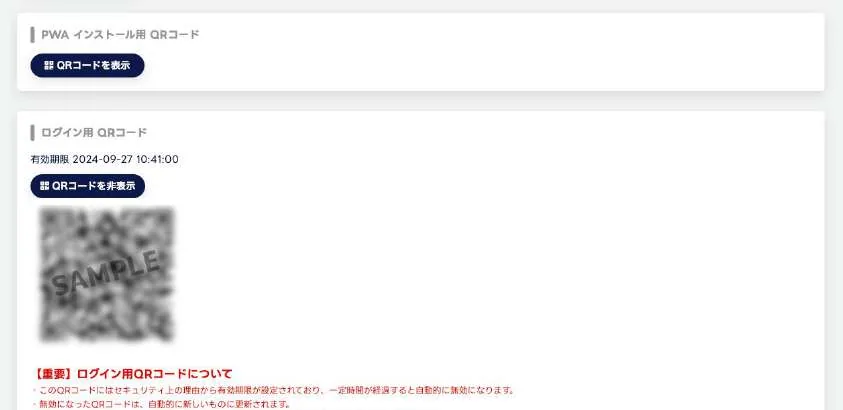
Open STEP 1 of "PWA Installation to Login" and the "PWA Installation QR Code" is shown. Scan it with your smartphone's standard camera app.
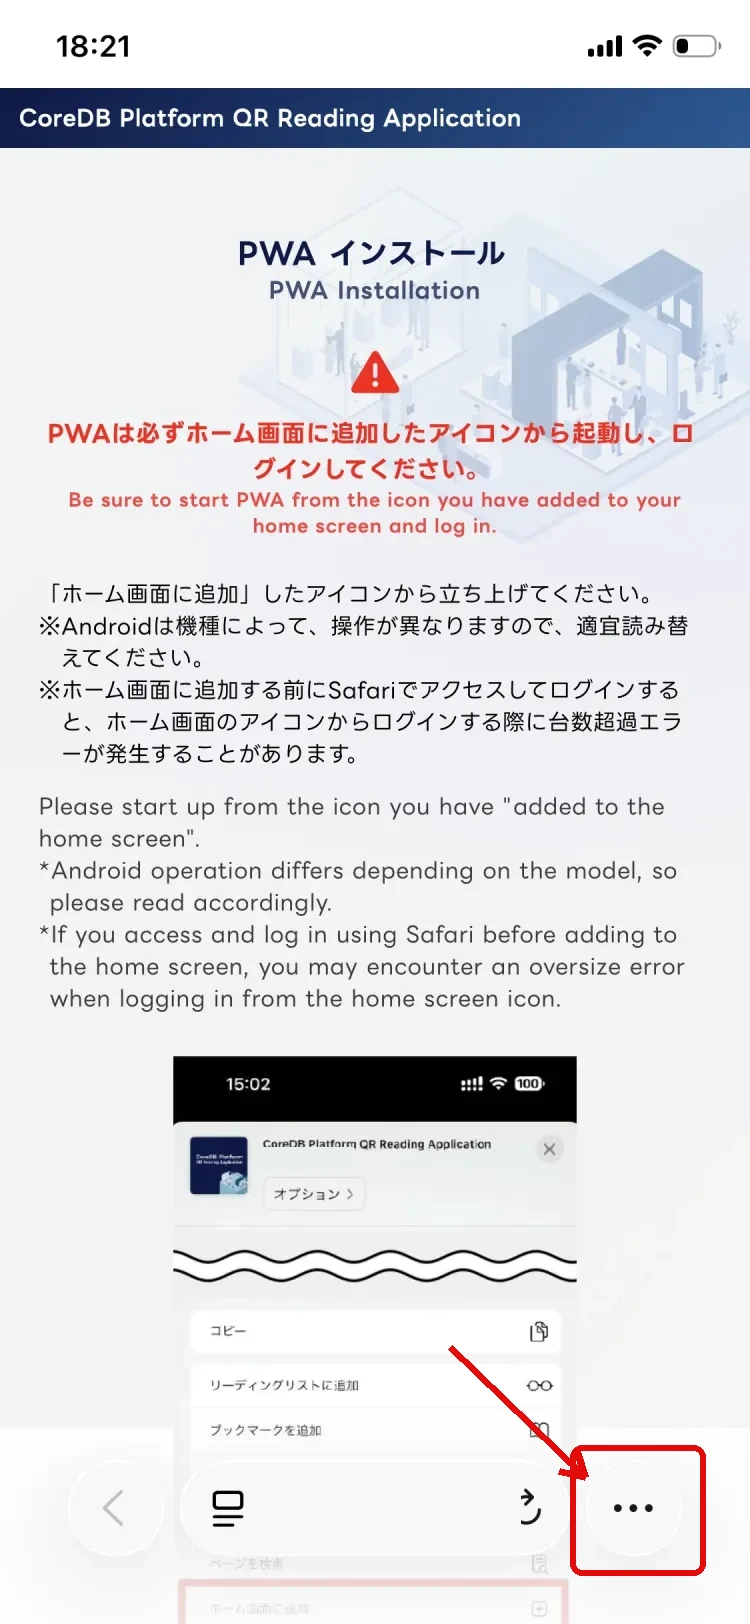
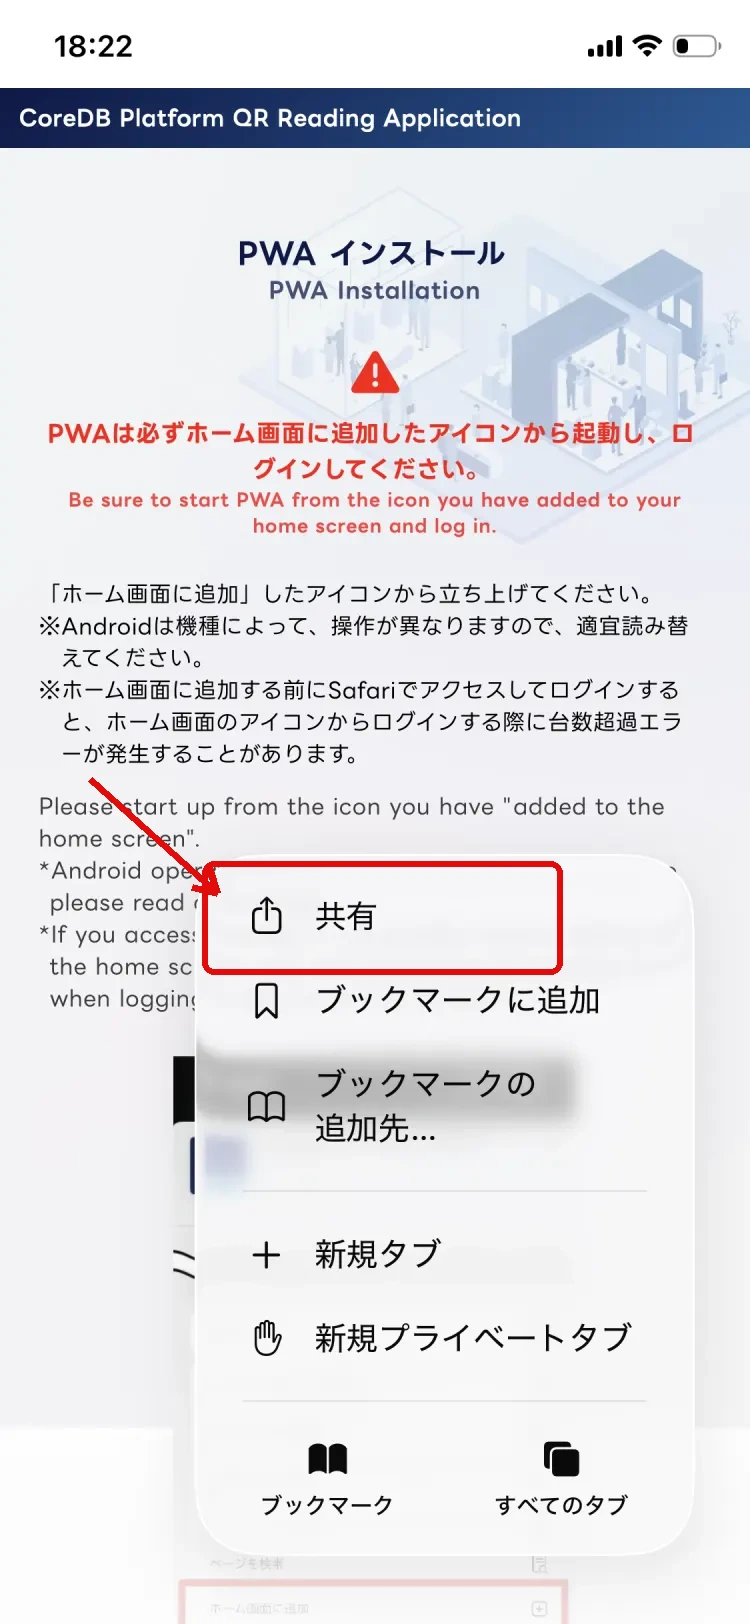
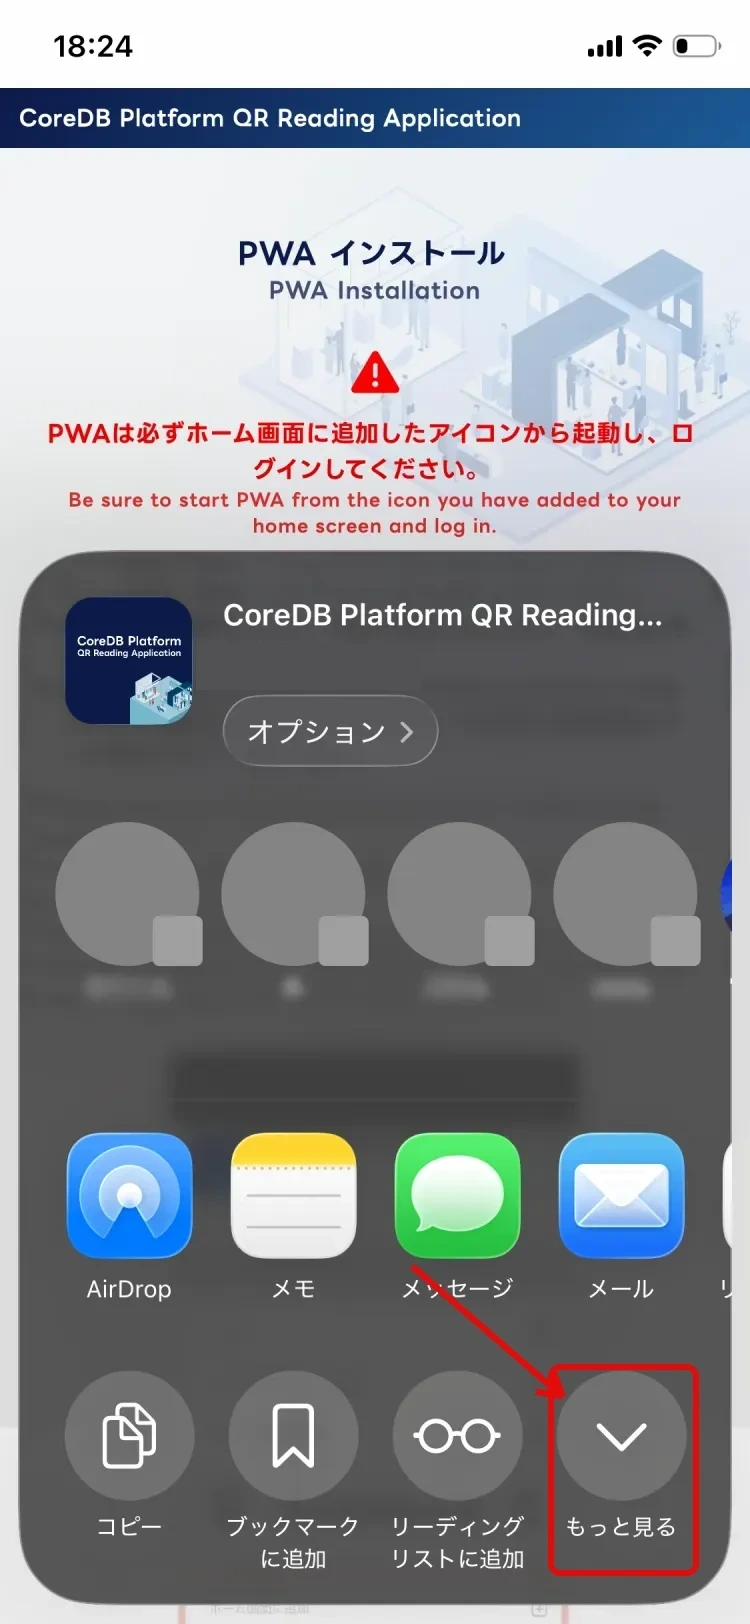
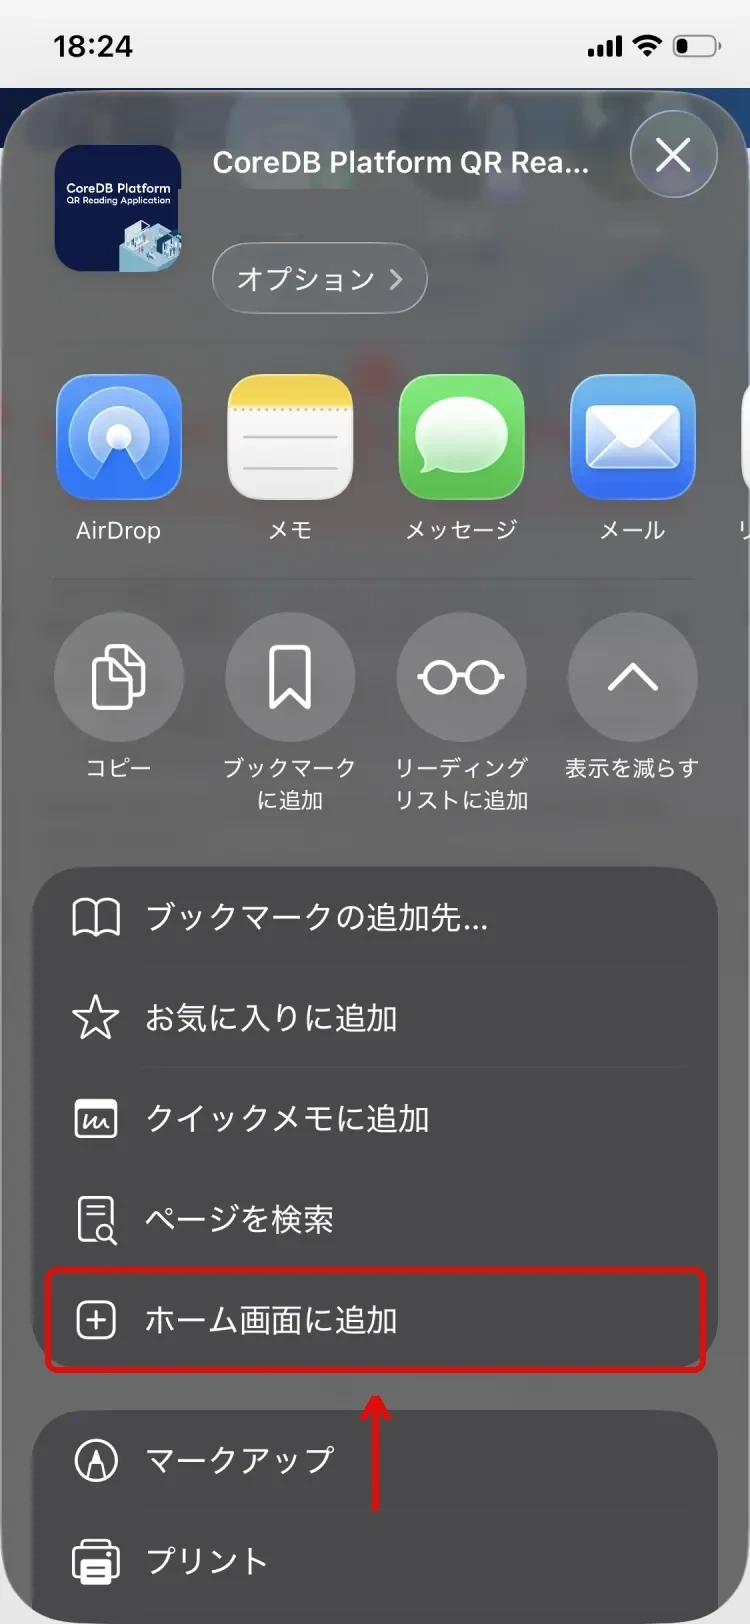
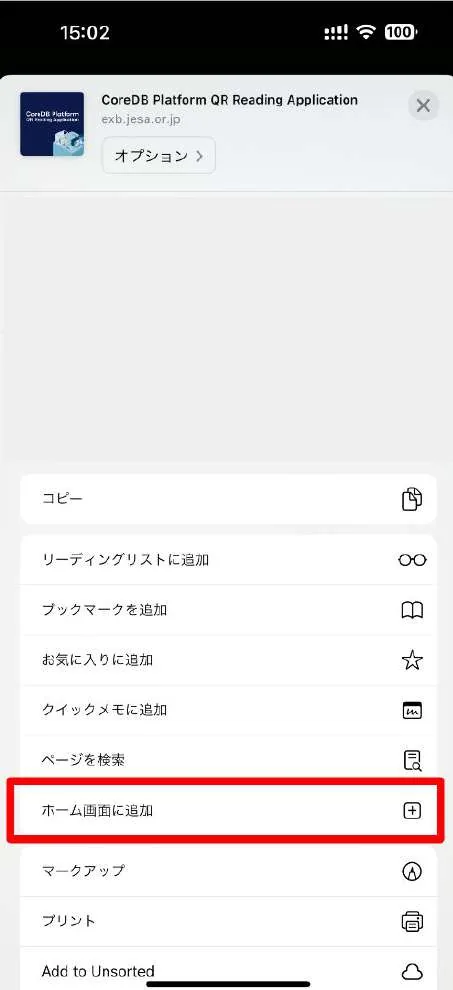
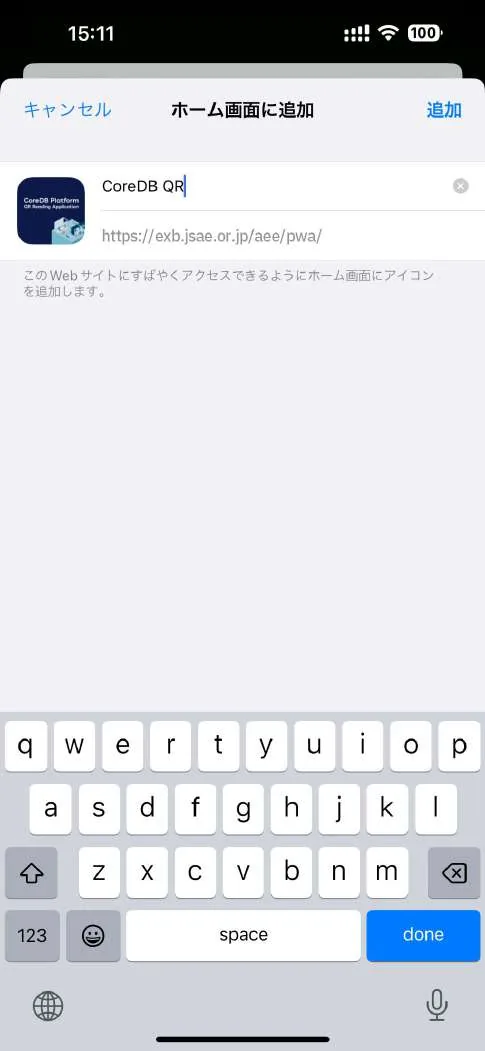
* This section shows the installation procedure on an iPhone as an example. For Android, see "4. Installation (Android)".
* Be careful not to open Safari in private (incognito) mode.


▼ The screenshots below are from iOS 25 and earlier.


Tap the added icon and proceed to "5. Logging In".
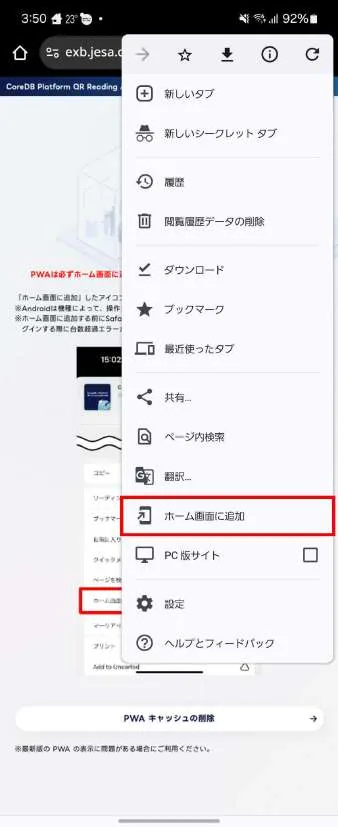
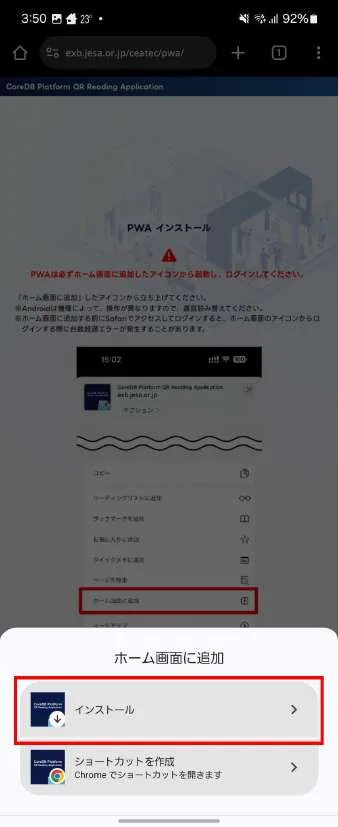
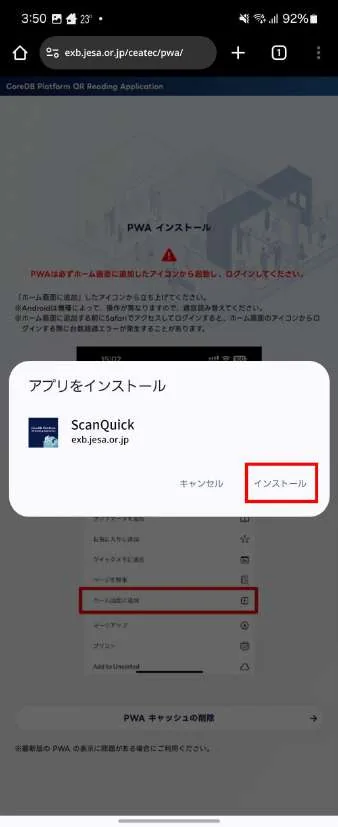
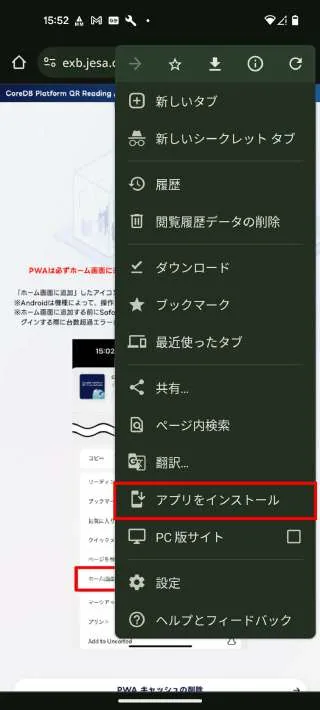
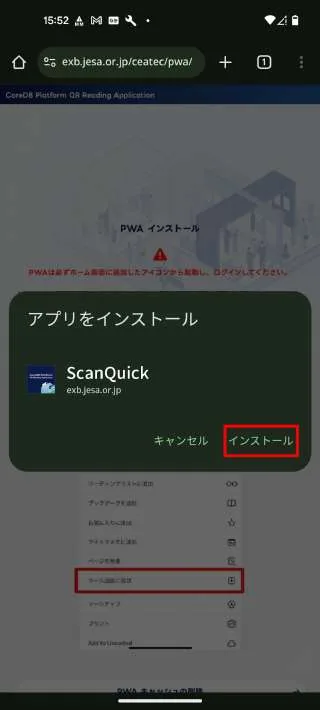
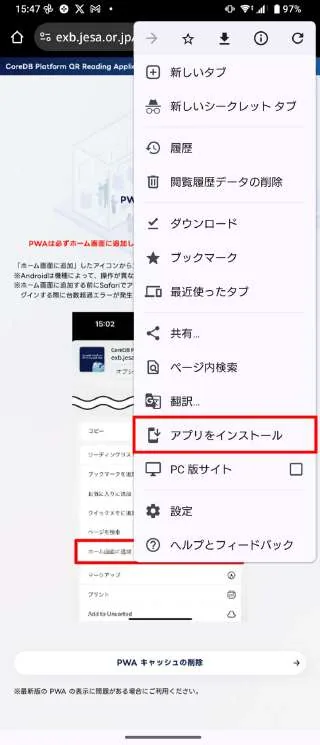
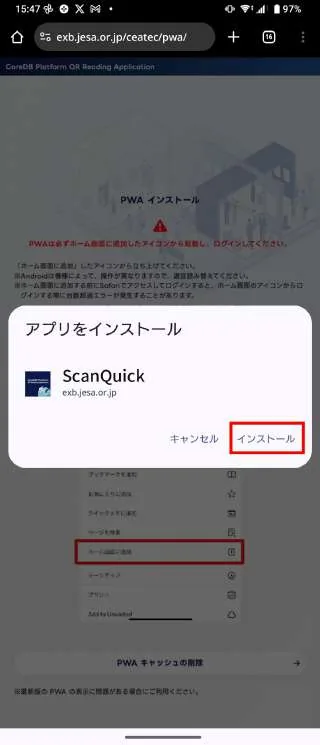
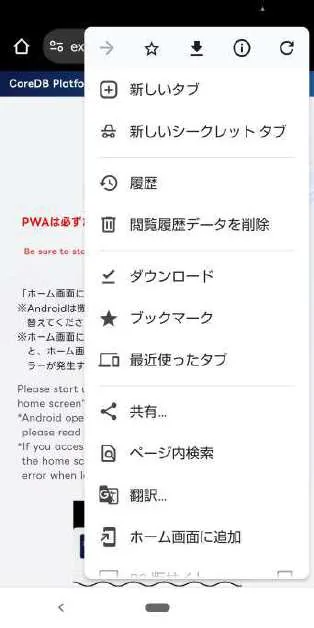
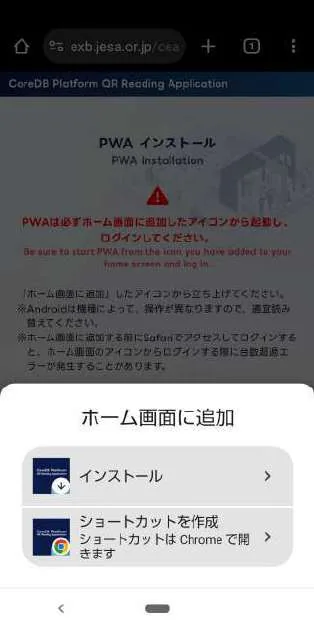
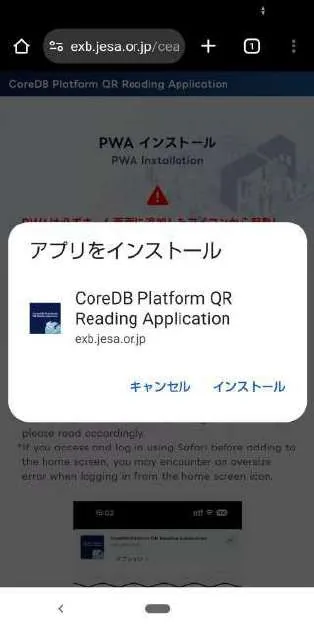
The procedure varies depending on the Android model, so please adapt as needed. Examples for typical models are shown below.


After installing the PWA, log in so you can start scanning the QR codes on admission passes.


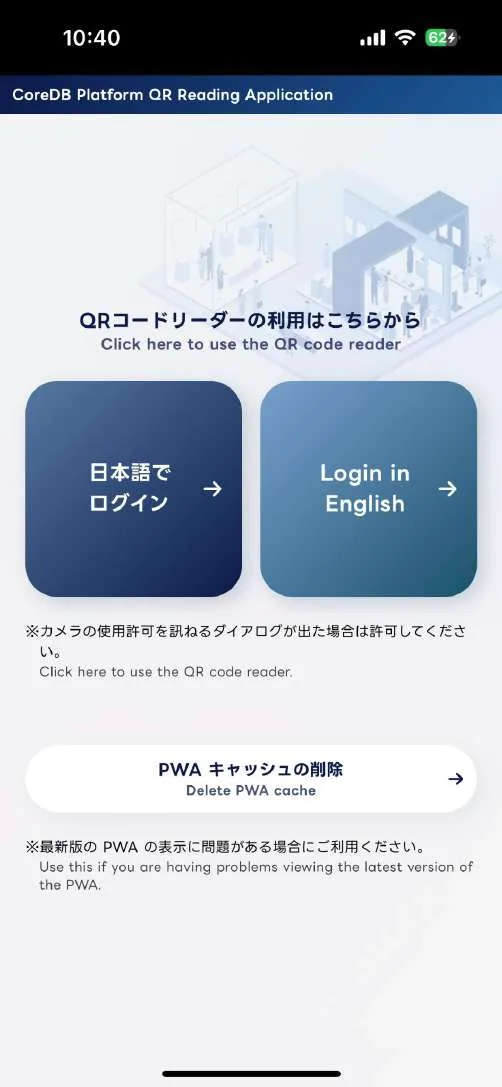
* Select your language at login. The language cannot be changed while logged in.
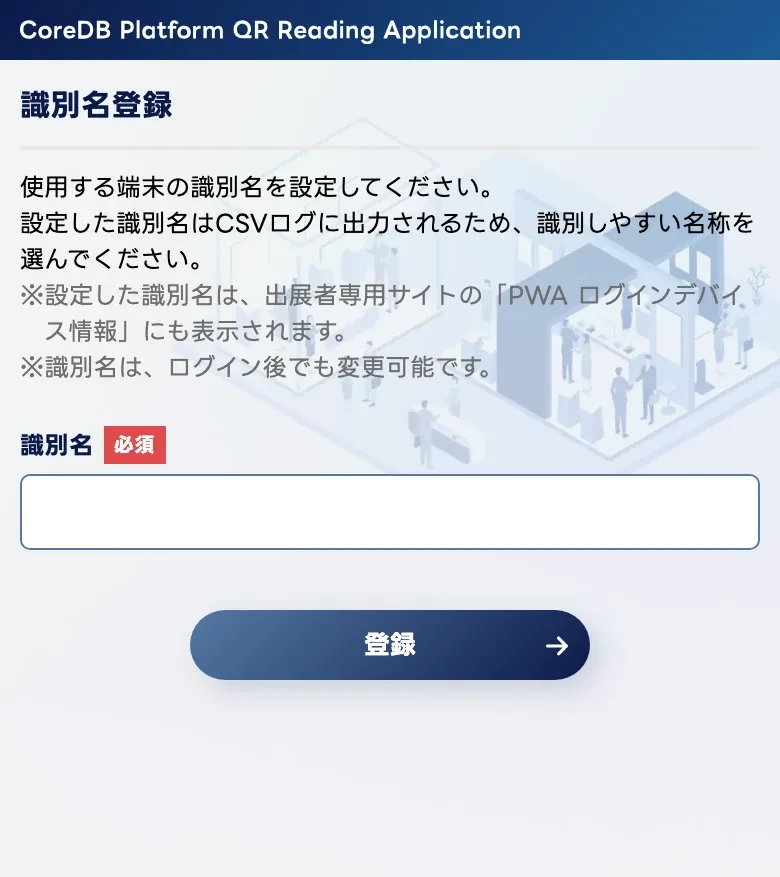
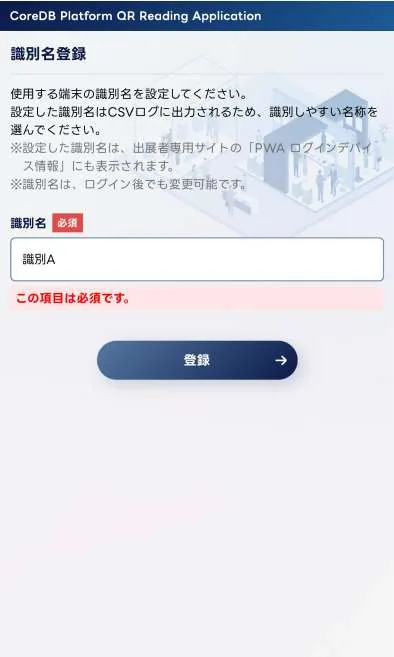
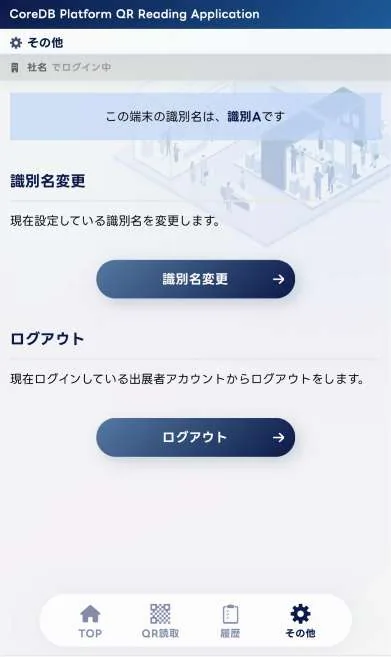
Set an identification name for the device you are using. The identification name is output to the CSV log, so choose a name that is easy to identify. (It is also displayed in "PWA Login Device Information" on the Exhibitor Only Site, and can be changed after login.)


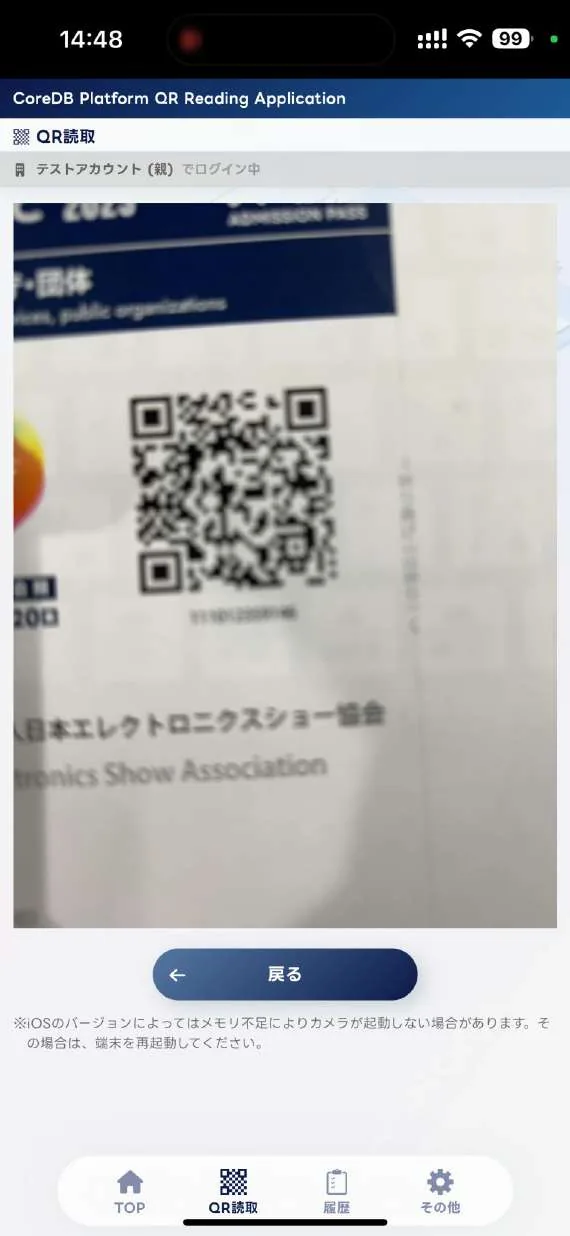
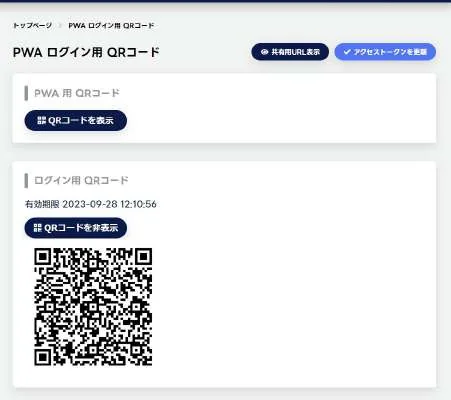
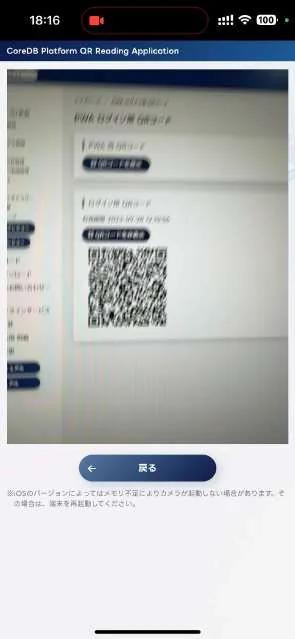
The "Login QR Code" is shown in STEP 6 of the page open on your PC. Scan it with the camera in the app. (The camera launches automatically once you register the device name.)


* Do not confuse it with the "PWA Installation QR Code" in STEP 1.
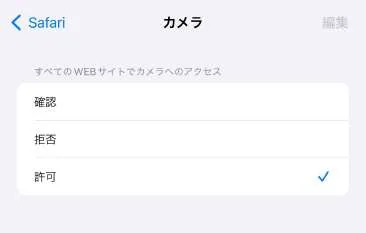
If a dialog asking for camera permission appears, please allow it. When the scan succeeds, the TOP screen is displayed.
The number of licences is the number of devices that can be logged in at the same time. With 3 licences, up to 3 devices can be used simultaneously.
There is only one login QR code per exhibitor. QR codes are not issued per device. Scan this same QR code on every device you use to log in.
The example below shows the same visitor being scanned on two devices.


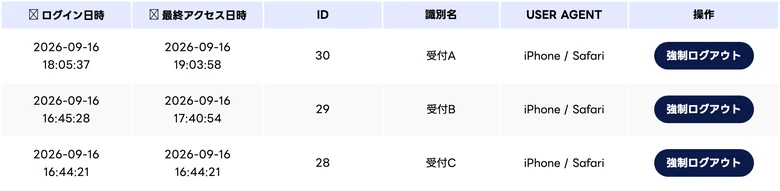
The identification name you enter at login appears as-is on the Exhibitor Only Site and in the CSV. It is the only way to tell which device performed a scan.


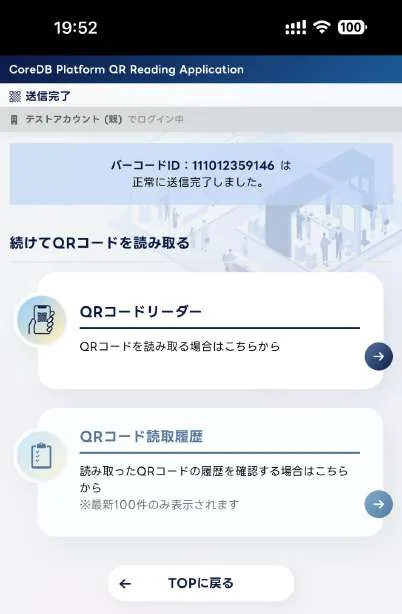
※ Data is not delivered to the Exhibitor Only Site just by scanning. You must send it. Until then it exists only on that device.
※ The current number of logged-in devices is also shown on the "QR code system QR code for login" page of the Exhibitor Only Site.
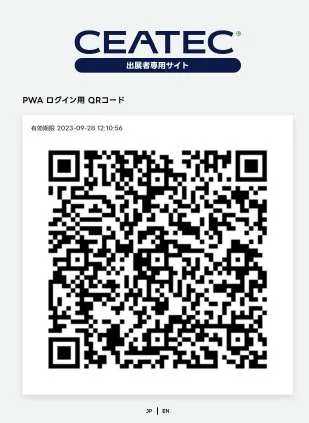
※ When installing on several devices at the venue, the login QR code can be enlarged (see "12. Precautions").
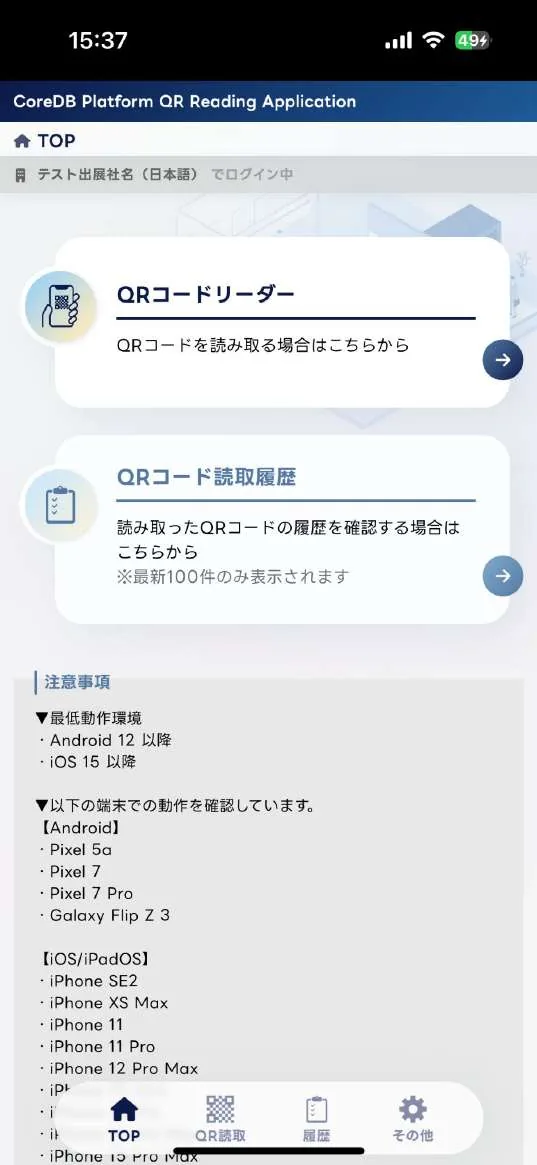
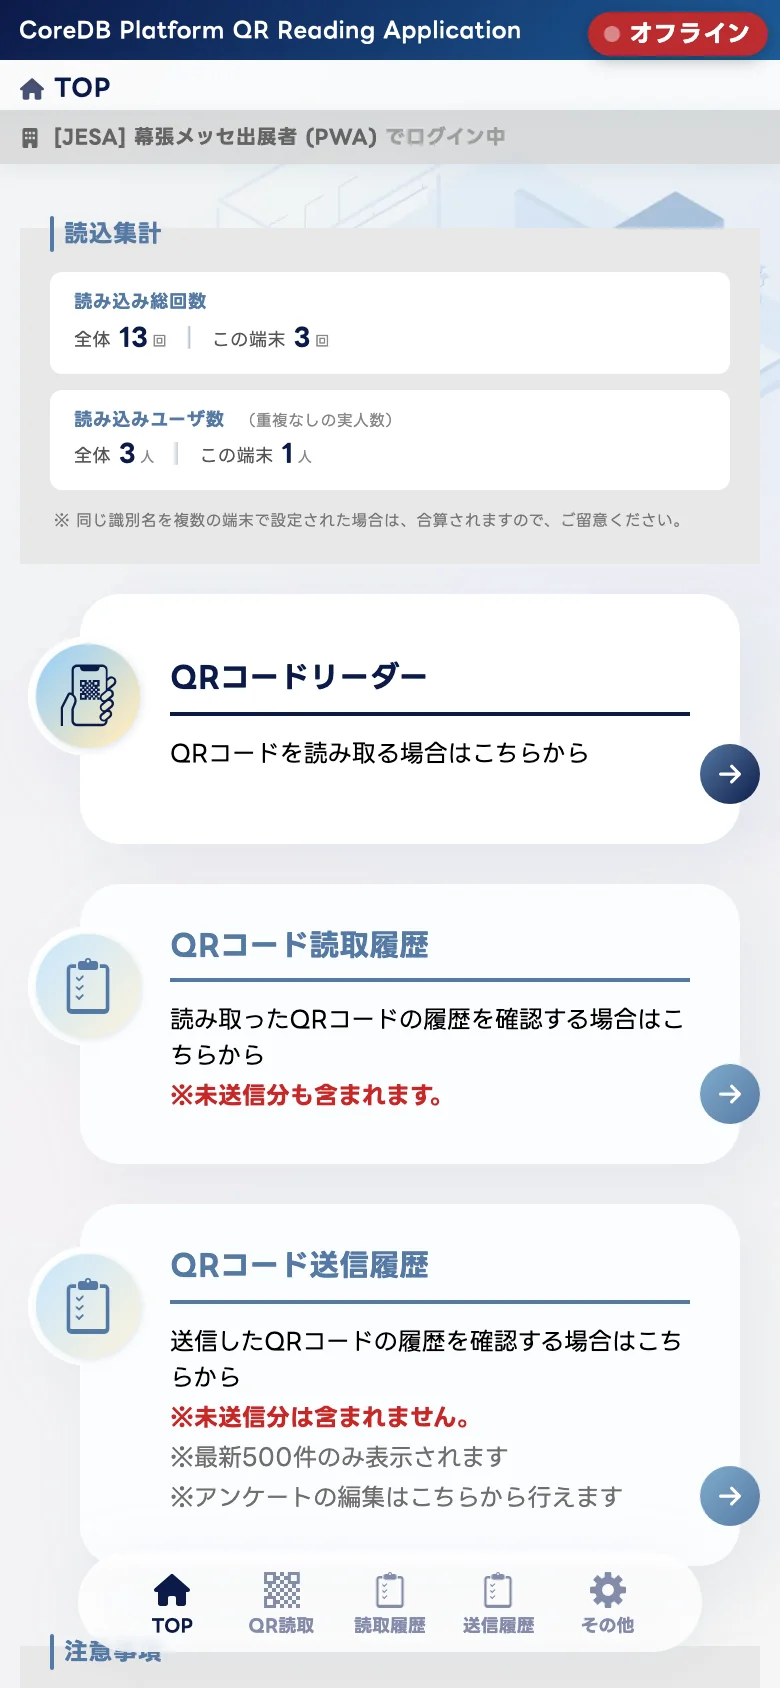
※ On the TOP screen, "Total" is the figure for the whole exhibitor and "This device" counts only the device you are logged in on.
Once you have logged in, you can scan admission pass QR codes.

NEW Top of the screen: total scans (all / this device) and unique visitors.
When you frame the QR code on the admission pass on screen, its content is read and the app automatically moves to the next screen. You can access each function from the navigation bar at the bottom of the screen.


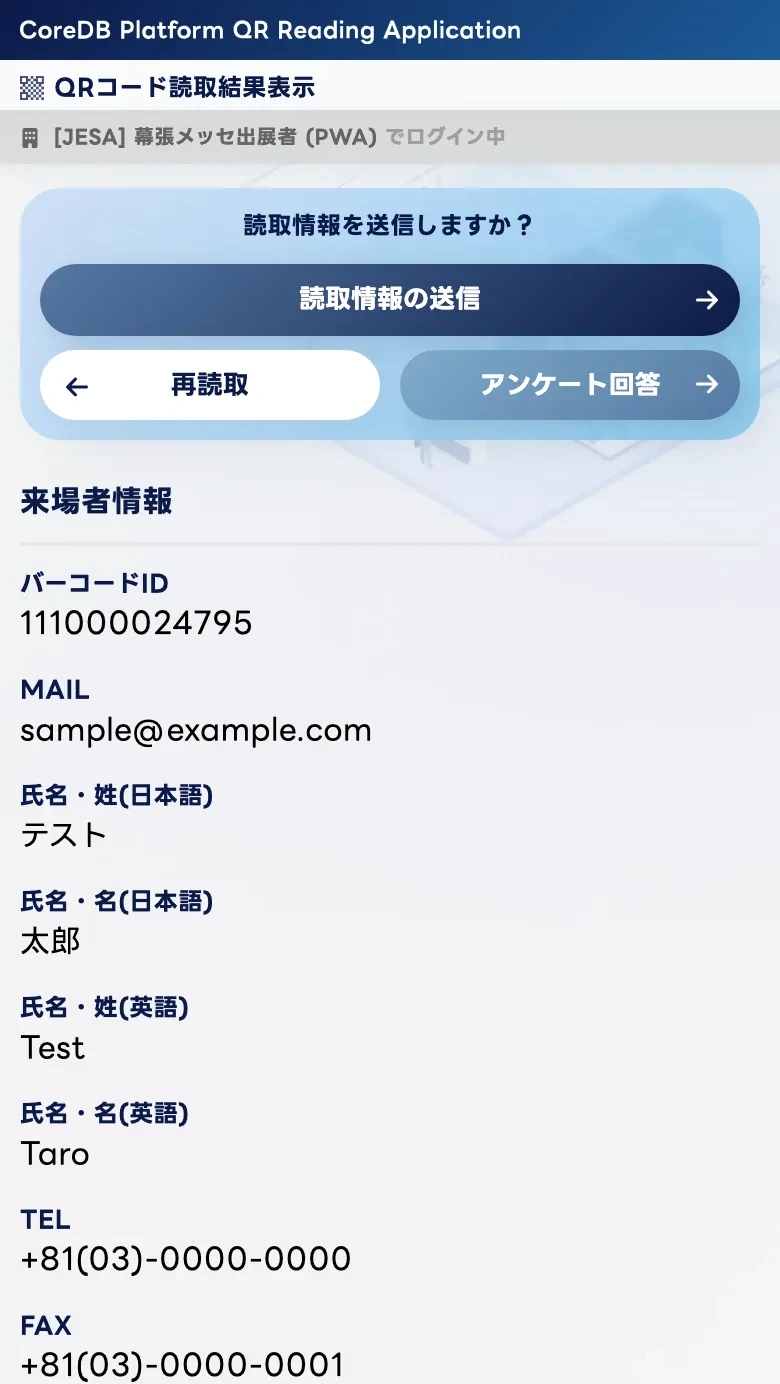
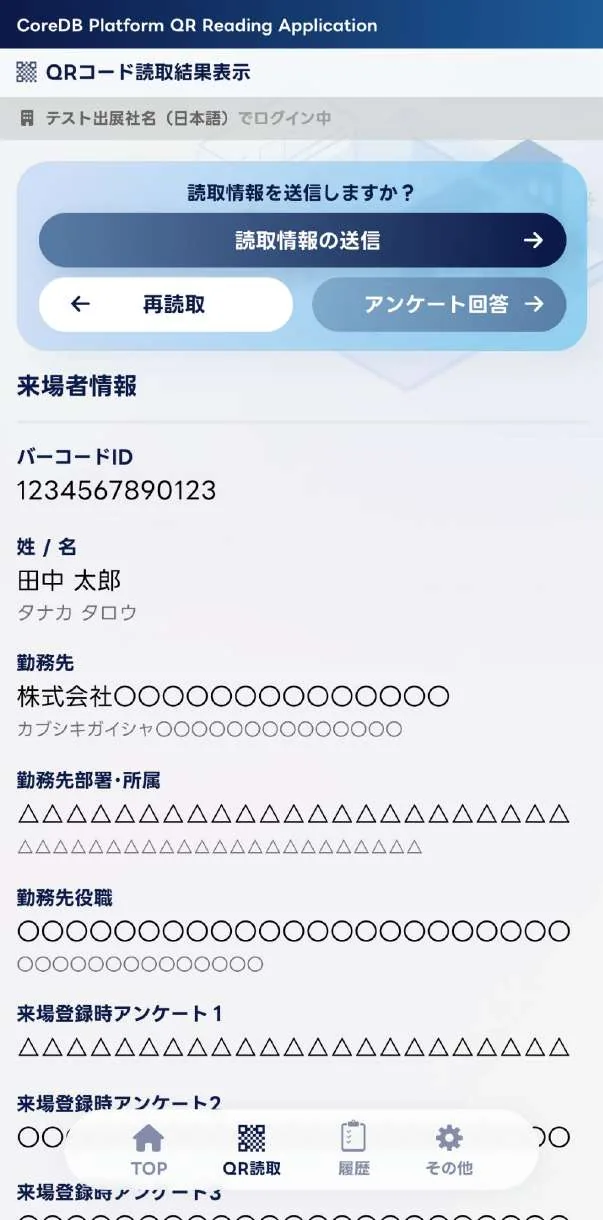
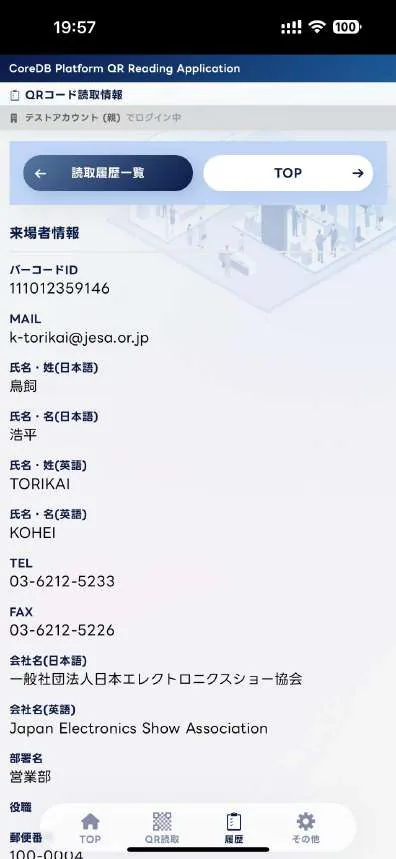
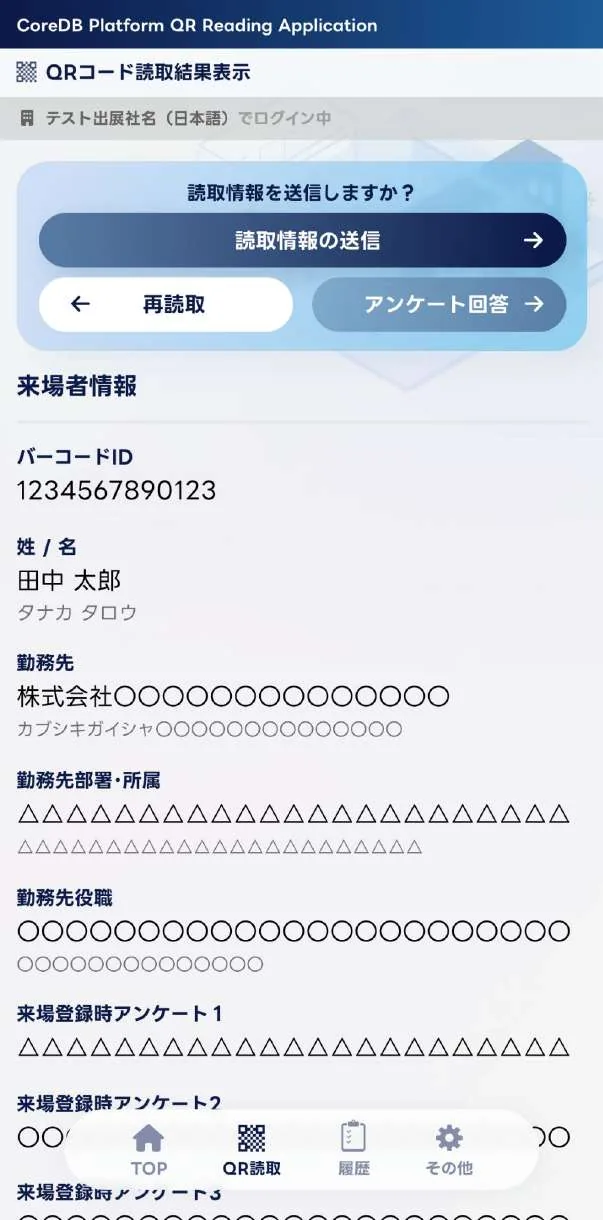
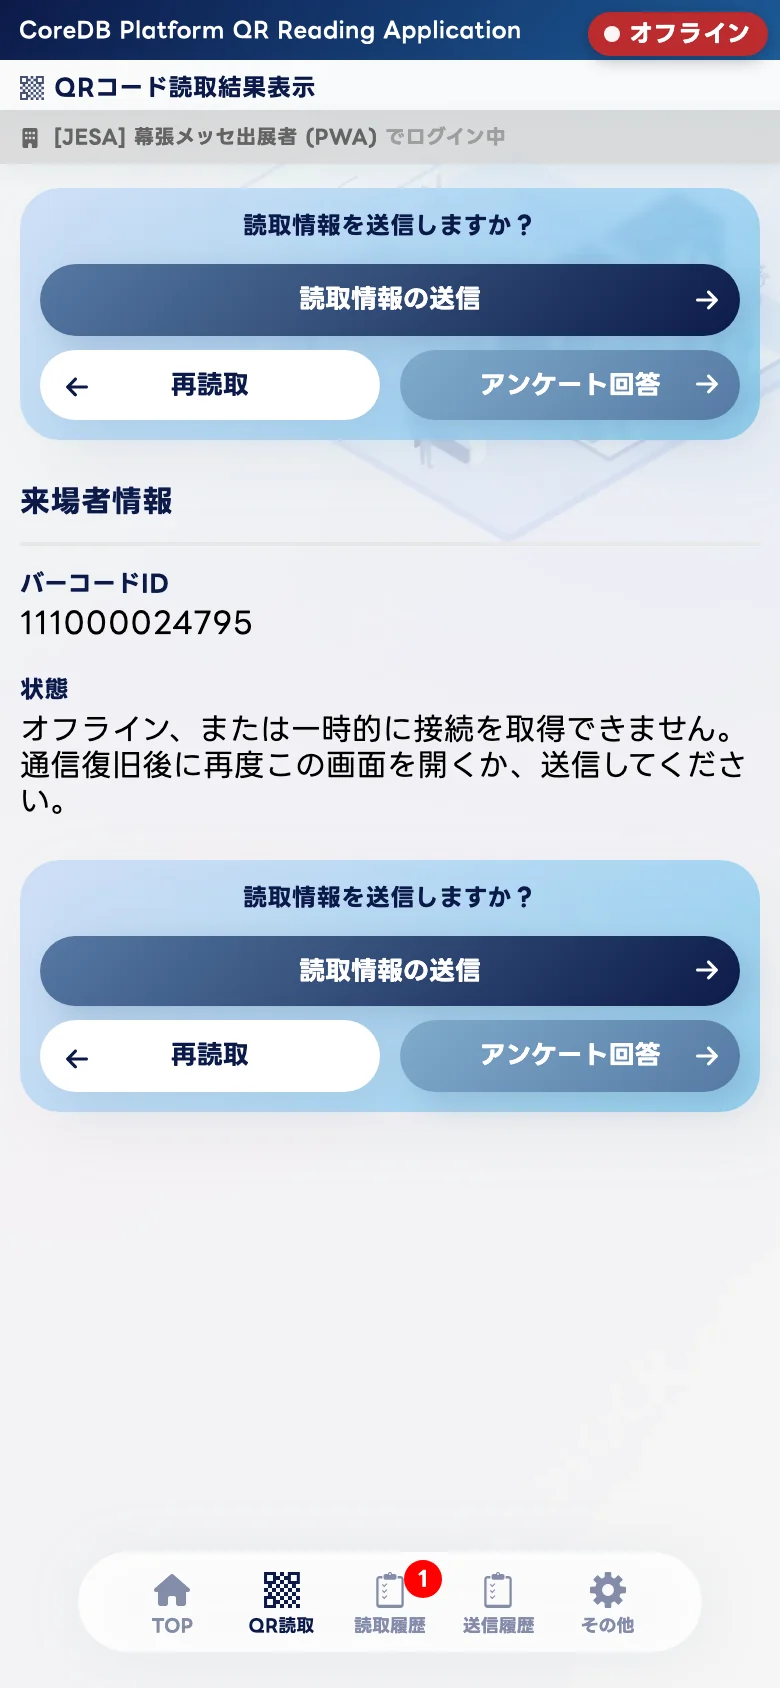
When a QR code is scanned successfully, the scan result screen is displayed. This screen displays personal information, so please handle it with great care.


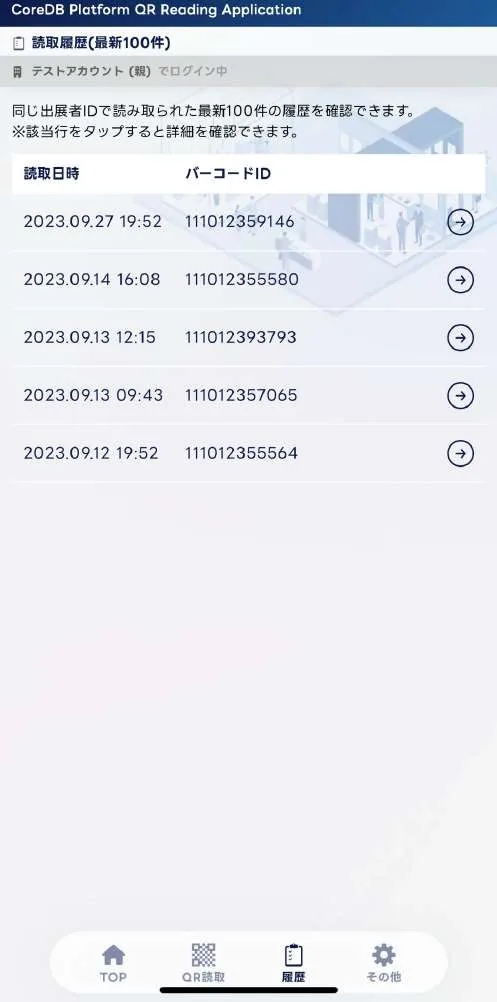
* Entries beyond the latest 500 are not displayed in the app, but all records are stored in the CSV file downloadable from the Exhibitor Only Site.


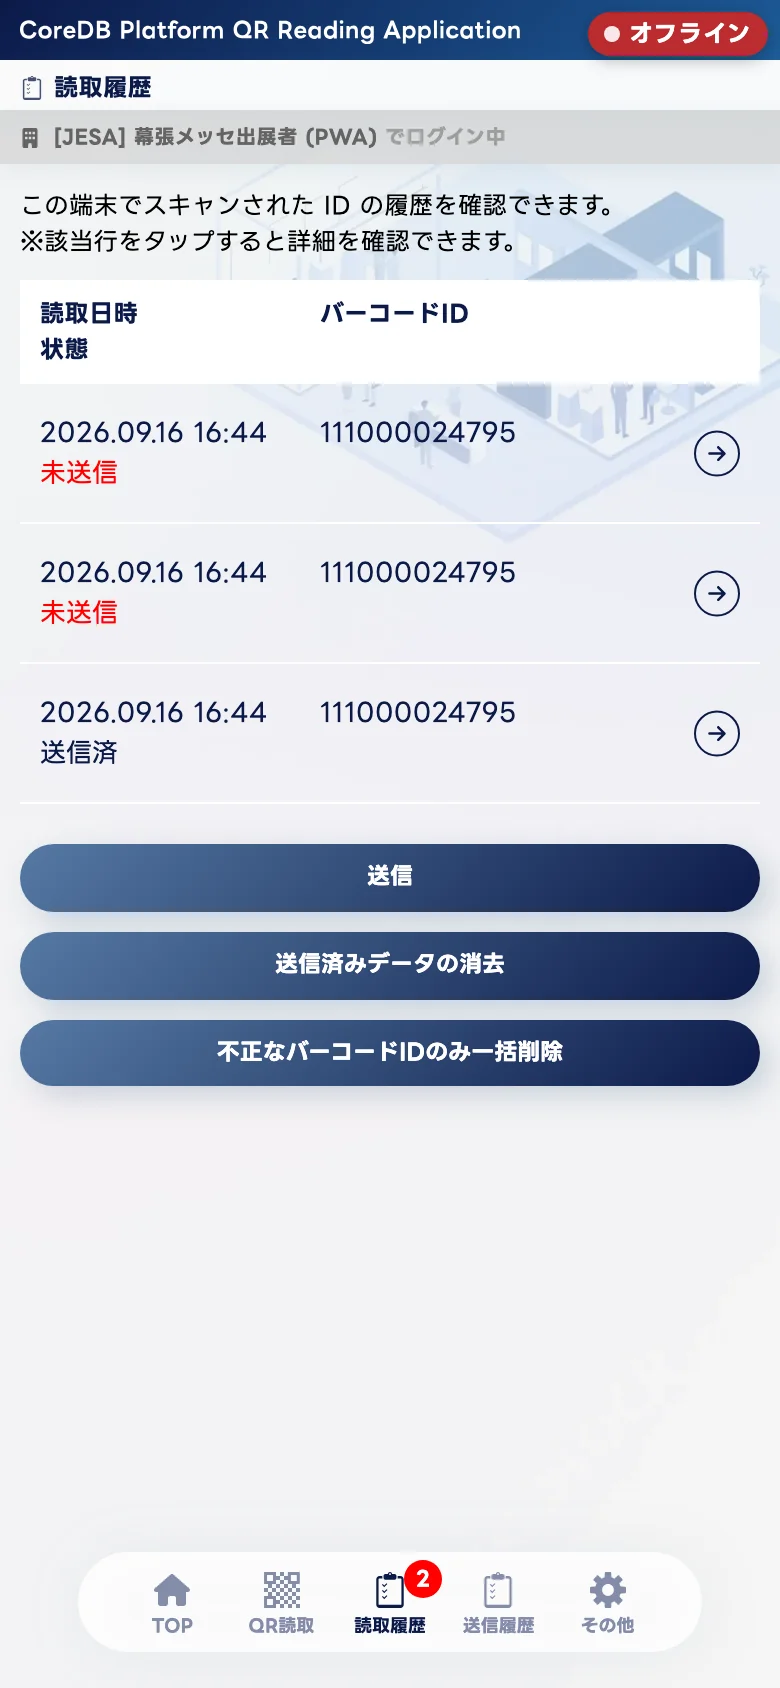
If you could not answer the survey at the moment of scanning, you can open the history later and answer or edit it. This lets you add your impressions of the visitor, or how promising the lead is, once you have finished serving them.
Only scans that satisfy both conditions — scanned with the PWA and successfully sent after scanning — are shown in the send history.
For use where reception is poor, see "8. Using the App When the Connection Is Unstable".
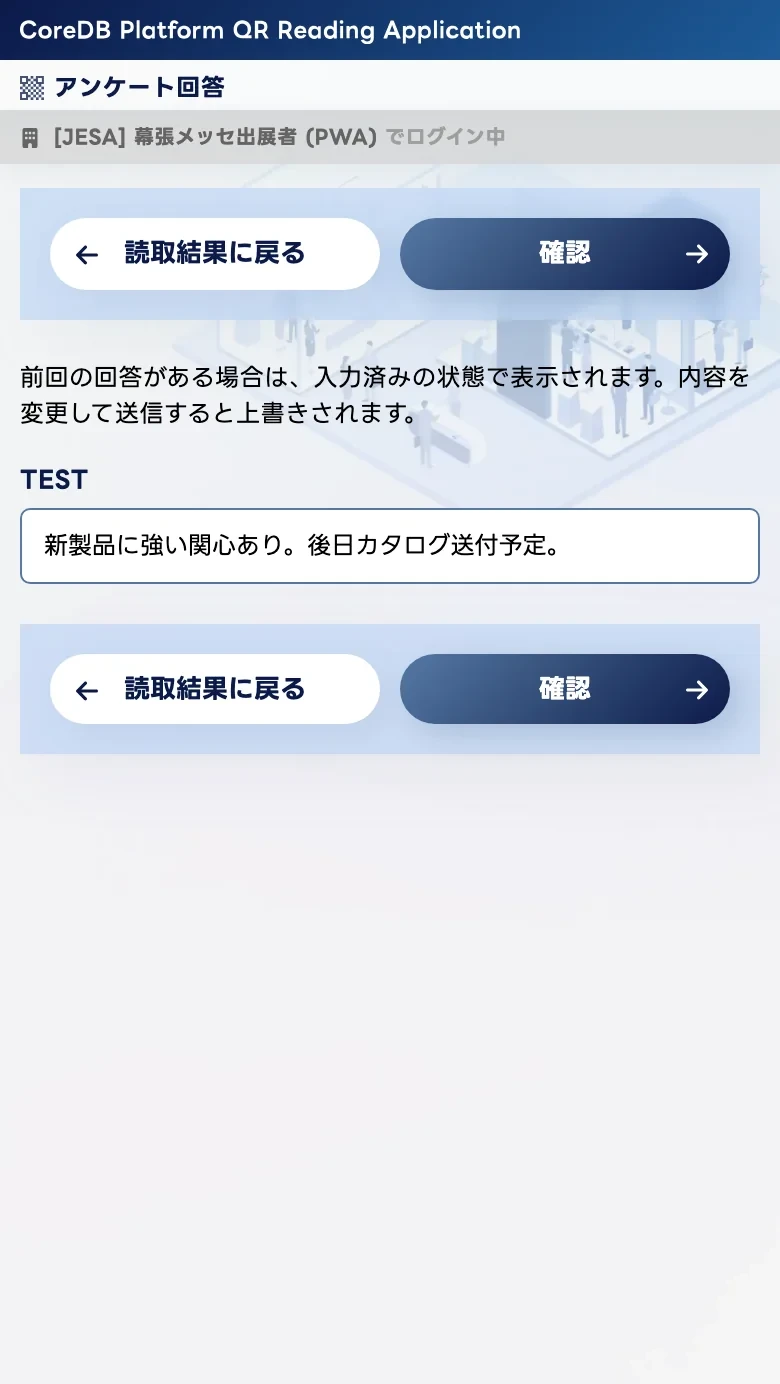
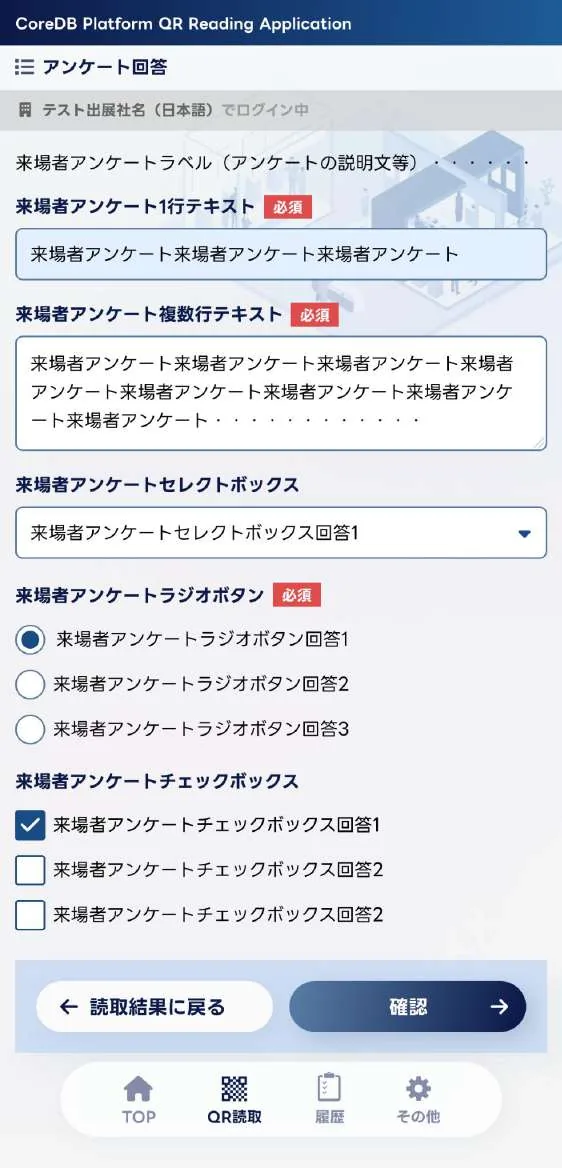
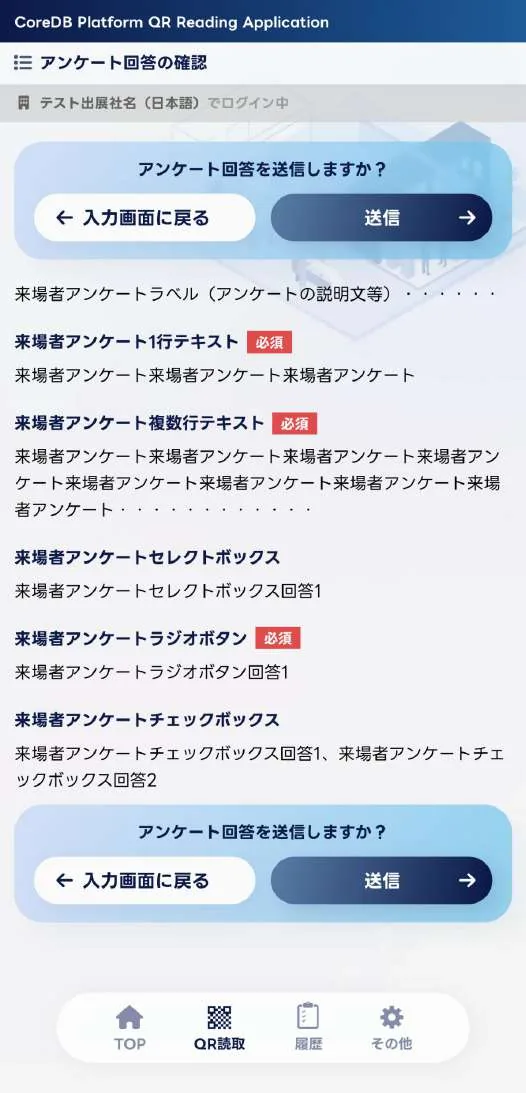
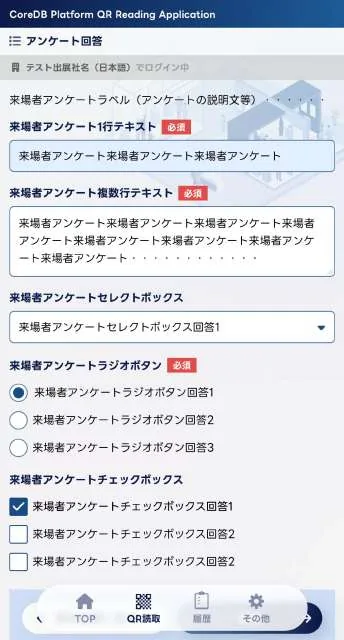
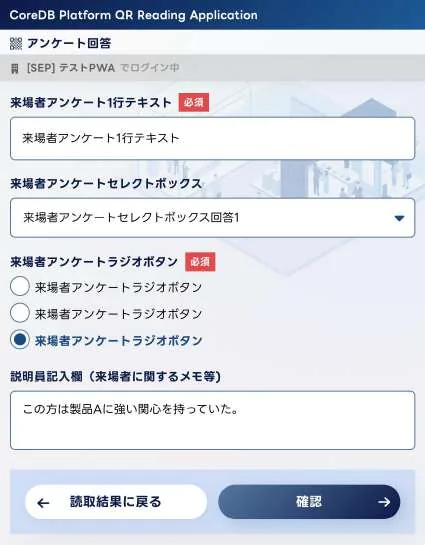
If you set up a visitor survey on the Exhibitor Only Site, it can be answered from the app. The responses are stored in the CSV file. Tap "Answer Survey" on the scan result screen to go to the survey screen.


There is one set of survey responses per visitor. When you scan the visitor again, every question opens pre-filled with the previous answers. Questions you do not touch stay as they are; only the ones you change take a new value.
For the whole picture with two devices, see the diagram in "5. Logging In / Using multiple licences (multiple devices)". What is recorded is always the last set you sent, regardless of the CSV variant (per visitor / per scan).
The PWA is designed to be used online. However, reception at the venue can be unstable, so the app lets you keep scanning even while there is no connection. Scanned data is held on the device and sent once the connection returns.
When there is no connection, "● Offline" appears in the upper right of the screen. It disappears automatically once the connection returns. It is shown on every screen, not only on specific ones.


* Logging in requires a connection. Be sure to log in somewhere with good reception before entering the venue.
You can send from either of the following.
* Once sent, the data appears in "Send History" (a connection is required to display it).

There is a limit to how much scanned data the device can hold. Once the limit is reached you cannot scan any more, so please send regularly.
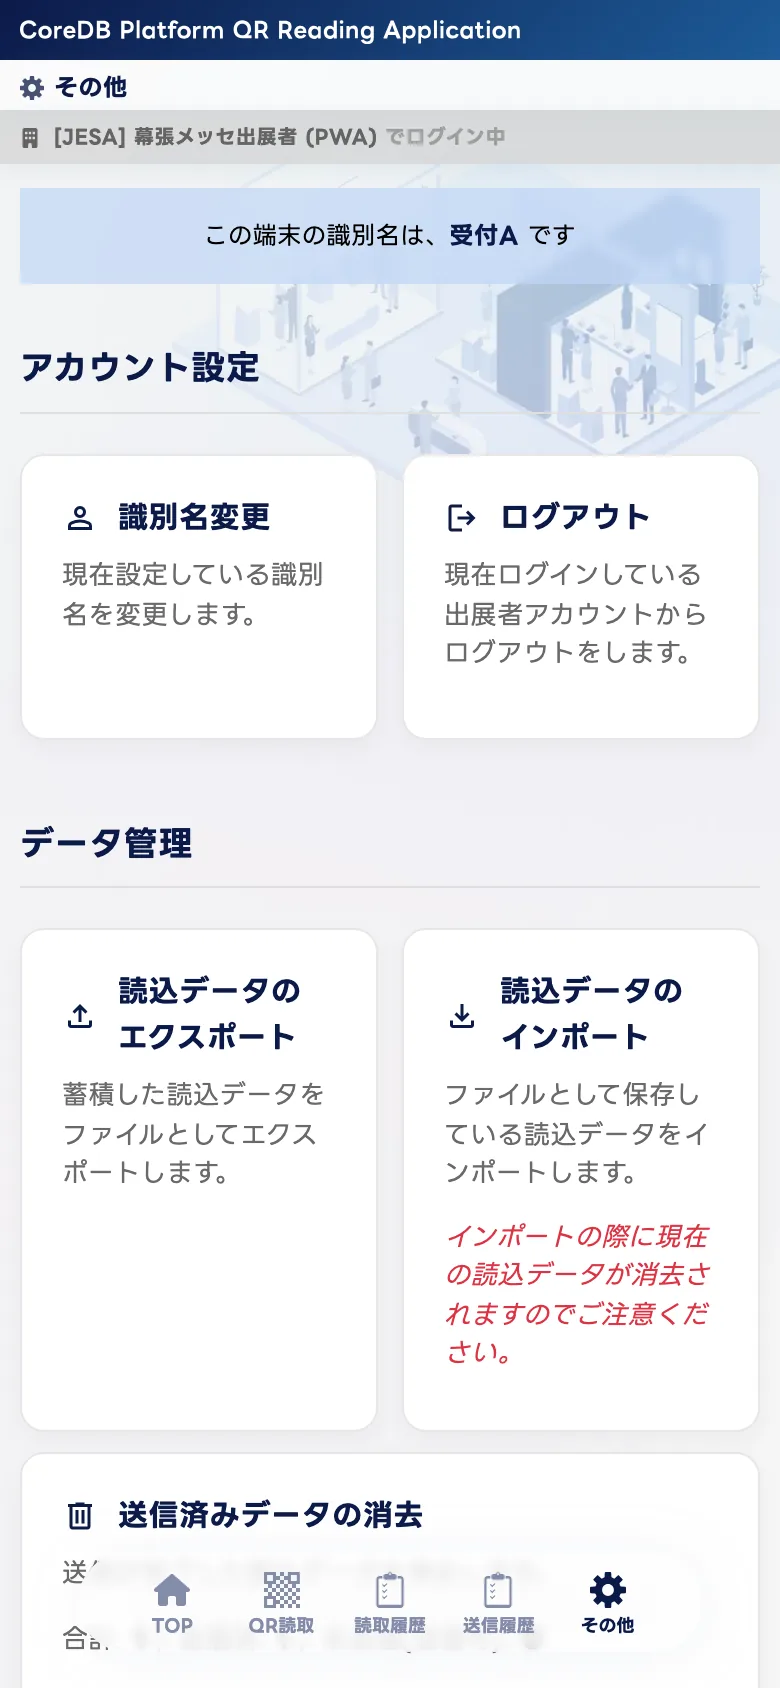
* The limit depends on the app settings. You can check the totals (total / sent / unsent) under data management in "Other".
If you scan a code that is not an admission pass, it is treated as an error on the spot, even with no connection. Codes scanned by mistake can be removed later with "Delete invalid barcode IDs only".
"Other" in the bottom menu contains "Data management", where you can check the totals and perform the following.

If there is no connection for an extended period, you are logged out as a safety measure and will need to log in again. Move somewhere with good reception and log in once more.
* Unsent scanned data remains on the device after you log in again. Send it once you are back online.
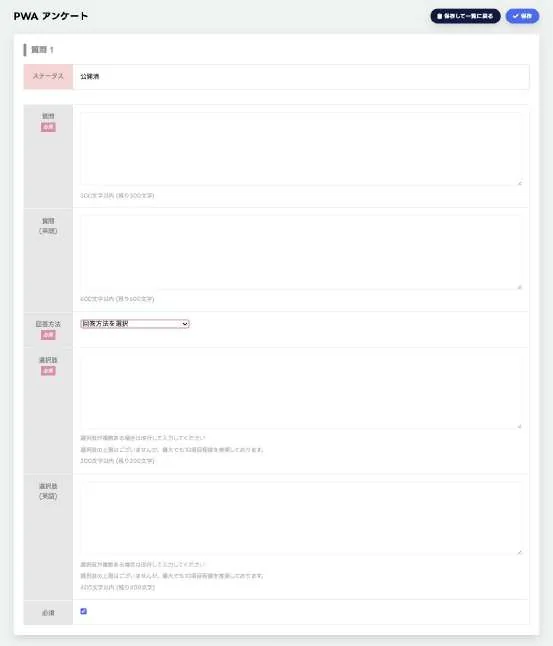
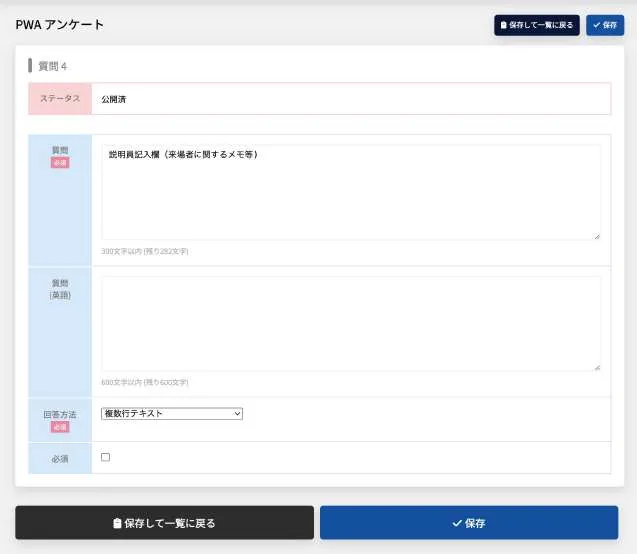
If you set up a survey on the Exhibitor Only Site, it can be answered from the app. Up to 10 questions can be added.


The survey function can also be used by booth staff to record notes and supplementary information about visitors after scanning their admission passes with the PWA. You can add a "notes field (free-text field)" to the survey items.


By adding a "staff entry field (notes about the visitor, etc.)", you can create a space to record the visitor's impressions, requests, conversation details, and so on.
When an admission pass QR code is scanned & sent at your booth, it is recorded as a CSV log. Generate it with the request button on the "Download Visit Logs" page.

"Booth Visitor Logs" comes in two variants, "per visitor" and "per scan", and you can download both. They differ only in how repeat scans are split into rows.
<Booth Visitor Logs CSV data contents>
* Columns are identical for both.
* Item specifications are subject to change due to ongoing development.
The "identification name" in the CSV is the name registered on each device at login. When you use multiple licences (multiple devices), this column is the only way to tell which device scanned the visitor.


※ If you give the same identification name to several devices, they cannot be told apart in the CSV. Use a different name for each device (e.g. Reception A, Reception B).


While it is within the validity period, the enlarged view can be displayed on another device by sharing the URL in the address bar. However, leaving a tablet or similar device displaying this QR code unattended at the venue greatly increases security risks — never do this under any circumstances.
* The specifications and design are subject to change due to future improvements.
This page is for exhibitors who have ordered rental smartphones. (If you have not ordered any, please skip this page.)